Inventory and Equipment Label Printing Information
COGZ Work Order Software offers label printing options for your maintenance needs. Whether you need labels for your equipment or for your inventory parts, the label printing function is available for you. There is no additional hardware necessary to print labels. We simply recommend using a good laser printer for your needs. If printing labels one at-a-time is a requirement for your operation, we can offer a printer for your needs.
Equipment Label Print Setup
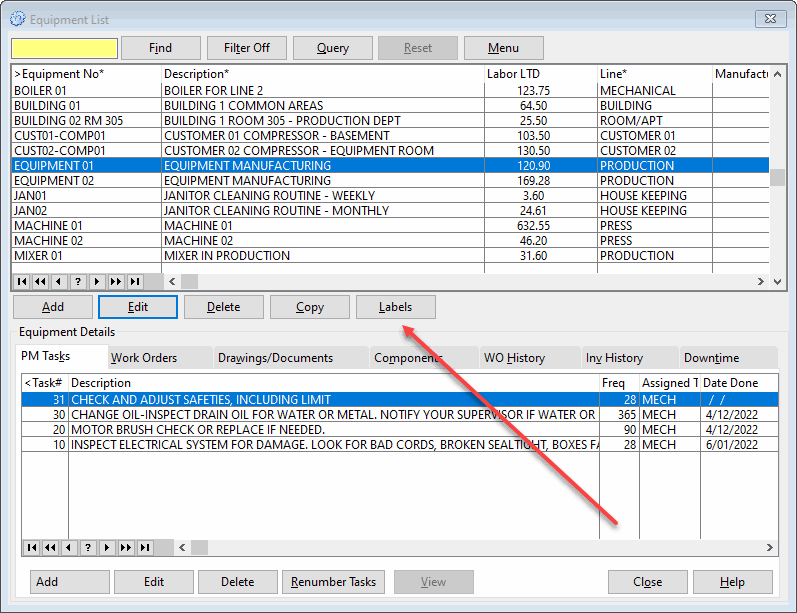
Equipment label printing is available in both the COGZ EZ and COGZ programs. Your equipment labels will display the equipment number, description, and location (if you have specified this for your equipment). To print labels for your equipment, you would need to add the equipment to your label queue from your equipment list. Selecting the particular equipment you want, make sure it is highlighted and use the Labels button to add the equipment to your equipment tag label queue.
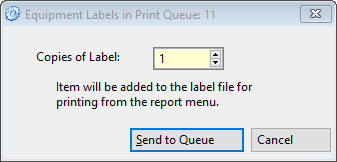
The Equipment Labels in Print Queue screen will display with the total labels in the queue in the screen header. With this screen you can indicate whether you want one or more labels to print in the Copies of Label field and then click Send to Queue. Selecting Cancel will not add this equipment to your label print queue.
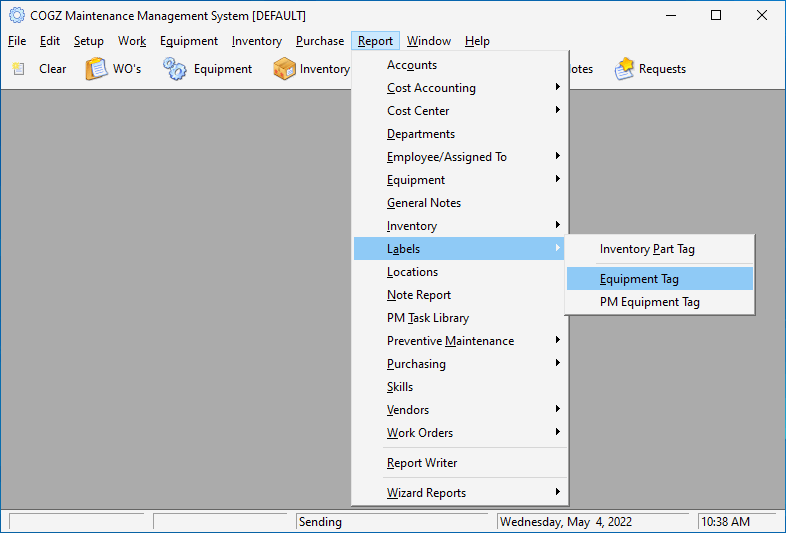
To print your equipment label queue, you would need to go to your report menu and select the Equipment Tag option as shown below.
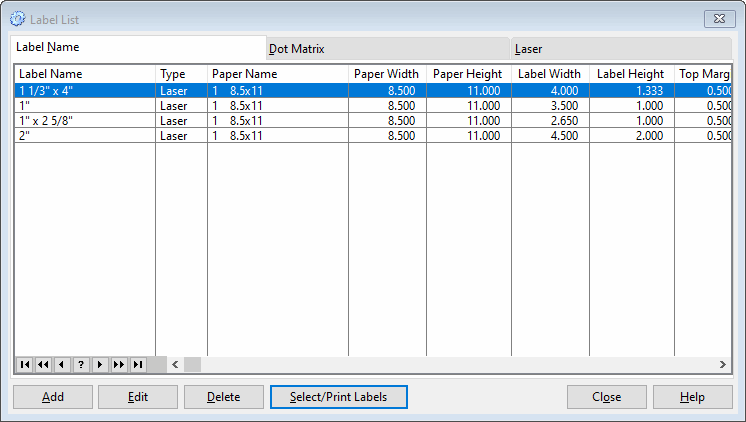
The Label List is where you would need to decide on your label size, depending on your label sheets. Avery Labels sizes and style numbers are as follows including defaults, which are set to print these types. These are the recommended parameters and should be followed as closely as possible, however these settings can be adjusted to fit your printer. Use Add to enter a new label size or Edit to modify an existing label size. The example below is for Avery Label size 5160: 1″ x 2 5/8″
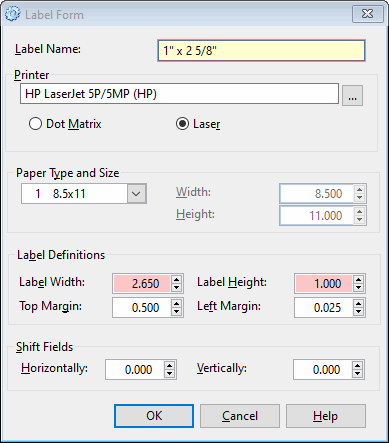
The Label Form allows you to add or edit label information.
Label Name: The name of the new label.
Printer: For on premises systems, this allows you to select which printer for the labels. For COGZWeb systems, the printer is selected later.
Dot Matrix/Laser: Select which type of printer you will be using.
Paper Type and Size: Specify the type and size of the paper you will be printing the labels on, including height and width.
- 1 8.5 x 11: This menu choice is used for standard sheet labels.
- 256 Custom: This menu choice is used for non-standard labels. For example, “one label at a time” printers.
- Other: This menu choice is used for non-standard labels or for printers that do not correctly import their supported paper types.
The Label Report Preview allows you to see what the labels will look like when they are printed. Use the Select/Print Labels option for this preview of the highlighted label on the Label List. The example preview below is for Avery Label size 5160 1″ x 2 5/8″

The bar codes print on the labels with the Optional Bar Code Module installed.

When you print your labels you can decide whether you want to delete your label queue (a Yes selection) or to retain your labels to reprint them (a No selection). Make your selection from the screen as shown below.

Inventory Part Label Print Setup
Inventory Part label printing is available in the COGZ program or with the addition of the Optional Inventory Enhancement Module with COGZ EZ. Your inventory part labels will contain information depending on the size of the label being printed. To print labels for your inventory parts, you would need to add the part to your label queue from your inventory list. Selecting the particular part you want, make sure it is highlighted and use the Labels button to add the part to your inventory part tag label queue. Alternatively, you may add a part to your label queue when receiving inventory, creating, printing, or receiving a purchase order.
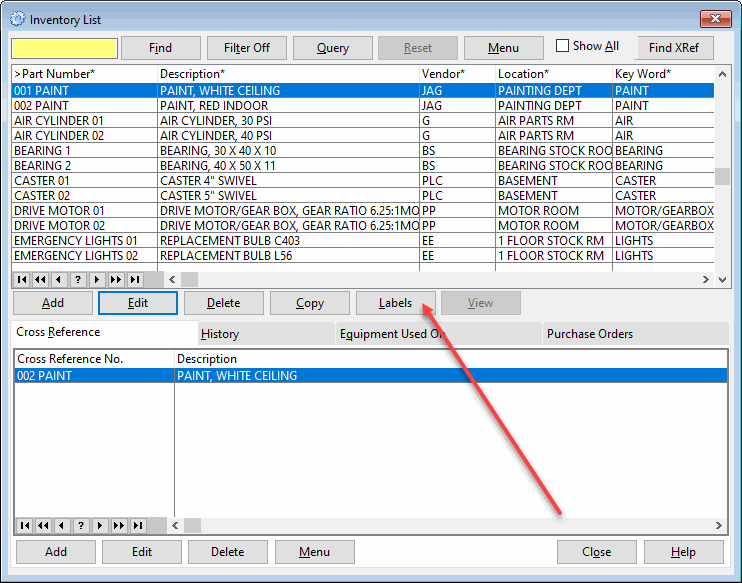
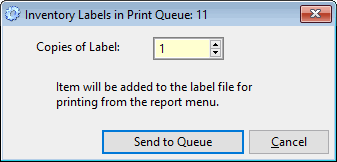
The Inventory Labels in Print Queue screen will display with the total labels in the queue in the screen header. With this screen you can indicate whether you want one or more labels to print in the Copies of Label field and then click OK to send the inventory part to your queue. Selecting Cancel will not add this inventory part to your label print queue.
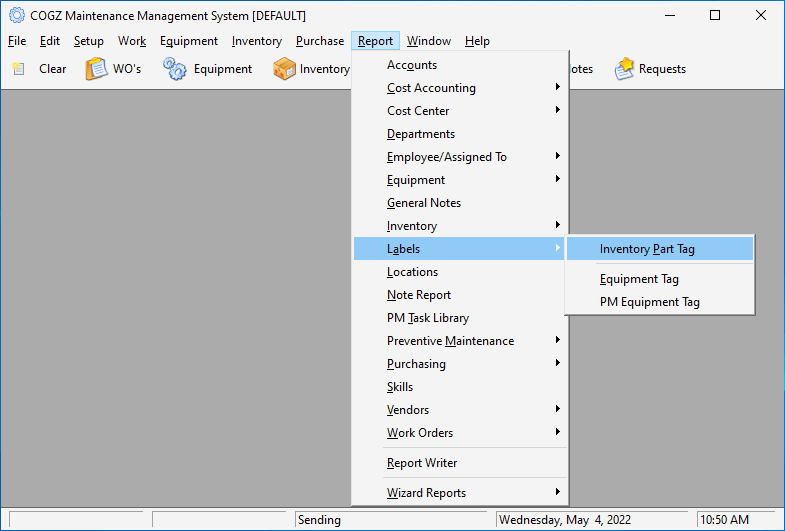
To print your inventory part label queue, you would need to go to your report menu and select the Inventory Part Tag option as shown above. The Inventory Part Label Report is where you will have the opportunity to print the labels that you created and queued to the printer from your Inventory List.

The Label List is where you would need to decide on your label size, depending on your label sheets. Avery Labels sizes and style numbers are as follows including defaults, which are set to print these types. These are the recommended parameters and should be followed as closely as possible, however these settings can be adjusted to fit your printer. Use Add to enter a new label size or Edit to modify an existing label size. The examples below are for two different Avery Label sizes.
Avery Labels Size 5162: 1 1/3” x 4”
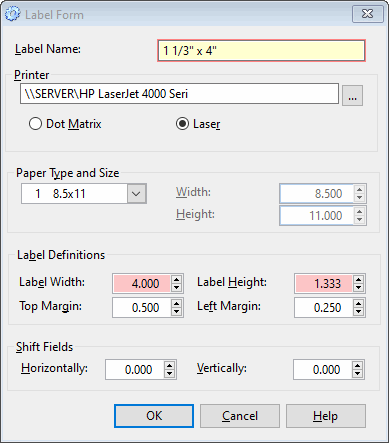
The Label Form allows you to add or edit label information.
Label Name: The name of the new label.
Printer: For on premises systems, this allows you to select which printer for the labels. For COGZWeb systems, the printer is selected later.
Dot Matrix/Laser: Select which type of printer you will be using.
Paper Type and Size: Specify the type and size of the paper you will be printing the labels on, including height and width.
- 1 8.5 x 11: This menu choice is used for standard sheet labels.
- 256 Custom: This menu choice is used for non-standard labels. For example, “one label at a time” printers.
- Other: This menu choice is used for non-standard labels or for printers that do not correctly import their supported paper types.
Label Report Preview, Avery Label Size 5162: 1 1/3″ x 4″
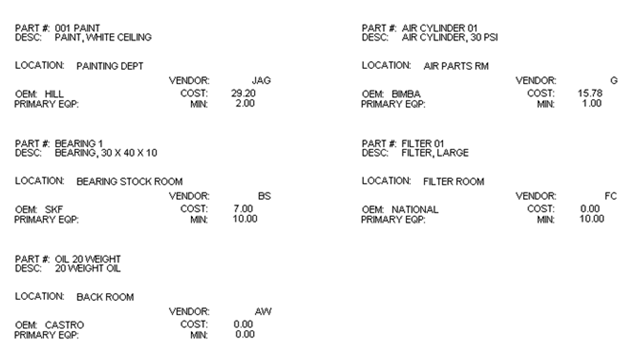
The Label Report Preview allows you to see what the labels will look like when they are printed. Use the Select/Print Labels option for this preview of the highlighted label on the Label List.
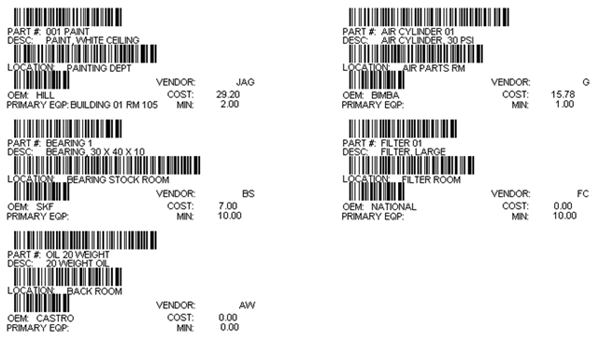
The bar codes print on the labels with the Optional Bar Code Module installed.
Label Report Preview, Avery Label Size 5160: 1″ x 2 5/8″


The bar codes print on the labels with the Optional Bar Code Module installed.
2″ or larger: Part Number, Description, Location, OEM, Primary Equipment, Vendor, Cost, Minimum, Used On, Number Used, By, Date, Number On Hand
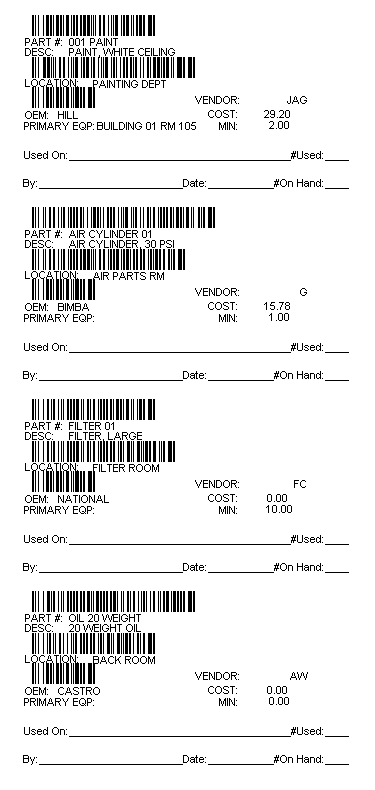
Configure the labels with the appropriate size from the Label List and press the Save button. Highlight the label and press the Select/Print Label button. Preview the report to verify that the labels are formatted correctly. The Label Report Preview allows you to see what the labels will look like when they are printed.

When you print your labels you can decide whether you want to delete your label queue (a Yes selection) or to retain your labels to reprint them (a No selection). Make your selection from the screen as shown above.
Additional information on COGZ Label Printing can be found in the COGZ Manual under Label Report in the Reports section.
