Downtime Module – Information and UsesThe Downtime Module is an available option which tracks actual Equipment Downtime. Using this module gives you the means to review equipment breakdowns and failures not just the time it takes to repair. With a record of these failures, you can easily decide whether you would need to replace the particular machine, as it is costing more money to fix than it would to purchase a replacement.
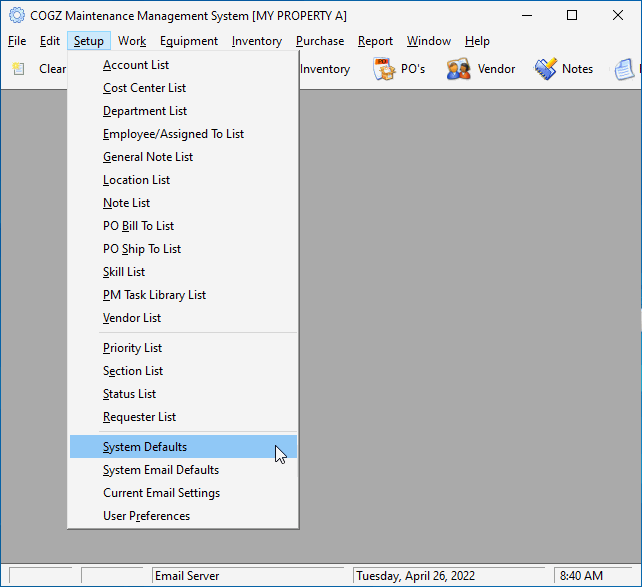
When this module is added to your system, you will have several new options available to you. In the System Defaults Form found in the Setup menu of your program, there will be a Downtime tab.
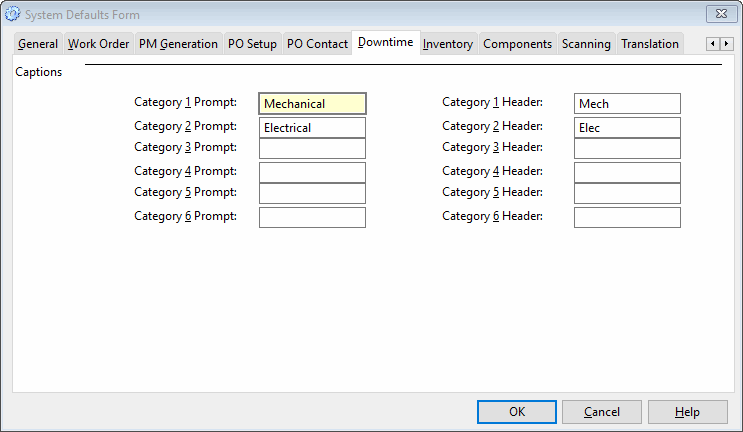
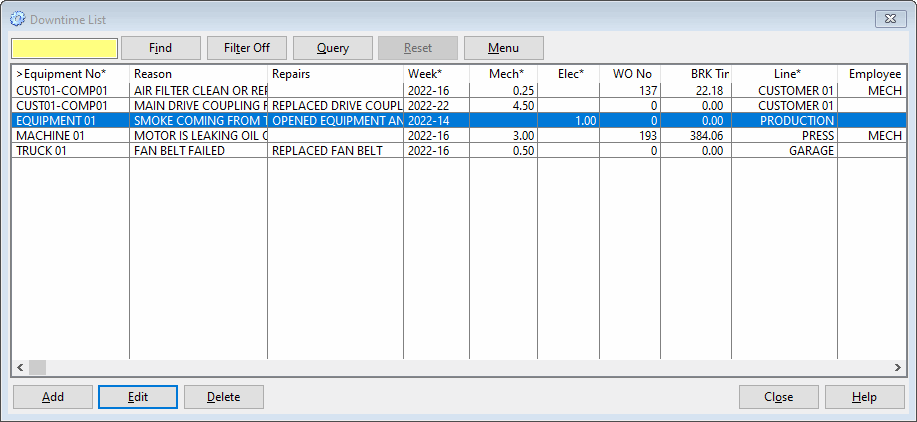
Use the Downtime tab to enter your specific downtime categories so you can keep track of the type of equipment breakdowns and failures. The category prompt would be for your downtime entry information. The category header would be the column list display in your Downtime List. Some sample categories are listed above for reference. With these added category prompts and headers, these will now be visible in the Downtime List. All of your equipment downtime will be listed here for your reference.
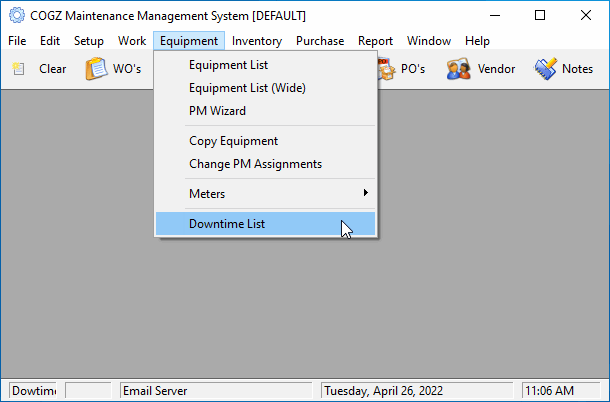
The Downtime List can be found in the Equipment menu of your program.
You can also access the downtime information from your Equipment List from the Downtime tab. This would give you a list of all the downtime associated with the selected piece of equipment. You can also enter the downtime from here or the main Downtime List as both will update with the information that is added.
Entering and Completing Downtime There are several ways to enter downtime information.
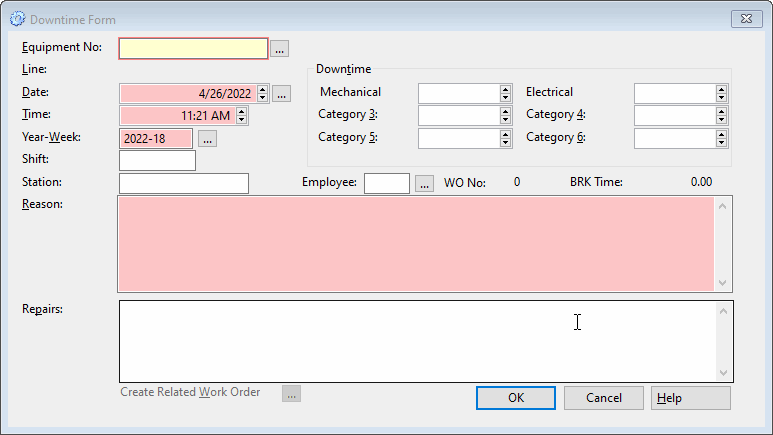
Below are the two ways to enter downtime from the Downtime Form The Downtime Form is where your downtime would be entered. Accessing this form from the main Downtime List will prompt you to enter the equipment, whereas entering the downtime from your Equipment List will have the equipment entered automatically for you. Otherwise, both forms are identical. The Downtime Form from the main Downtime List is shown above. Note the box you can click to create a work order from the information entered on the Downtime Form. This is optional; clicking the box brings up the Work Order Entry Form with much of the information pre-filled for you as well as connected to the Work Order.
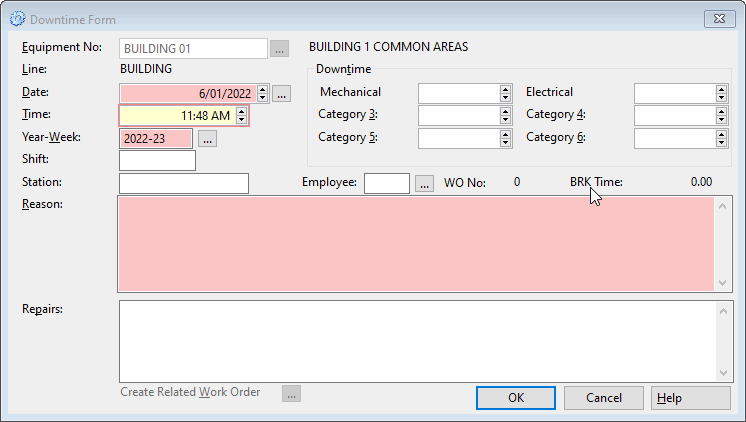
The Downtime Form accessed from your Equipment List. Another way to access the Downtime Form is from the Work Order Entry Form. Click the Create Downtime Record check box, then OK, and COGZ will bring up a pre-filled Downtime Form that will be connected to the Work Order. When closing a work order, the downtime record can be completed by checking Log Downtime on Close before leaving the form. Downtime can also be closed directly from the Downtime Form, then closing the linked Work Order, if so desired.
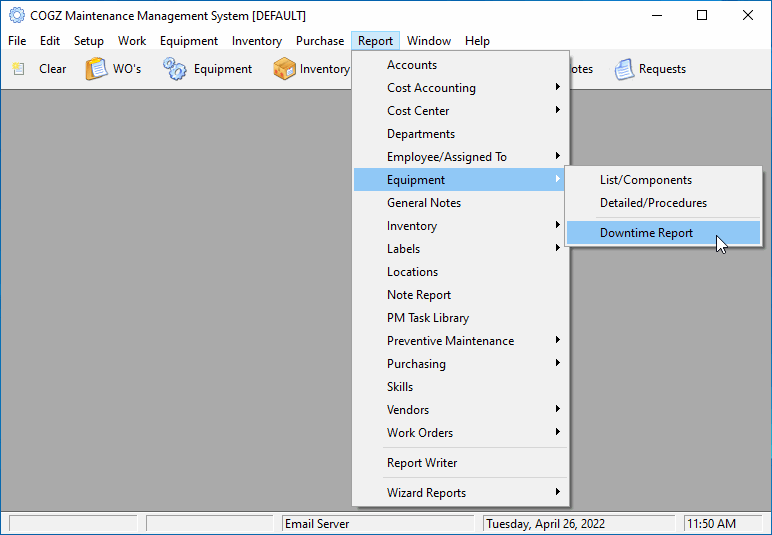
Besides the lists for tracking your equipment downtime and failures for your reference, you can also report on your downtime with the Downtime Report. This can be found in the Report menu under the Equipment report section.
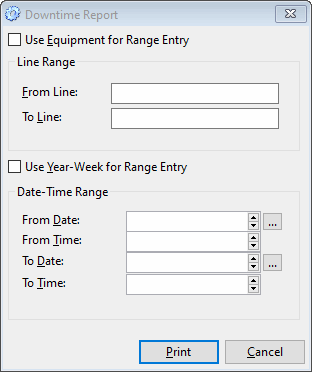
Use the Downtime Report menu to make your report specifications. Checking the Use Equipment for Range Entry or Use Year-Week for Range Entry check boxes offer other option selections for your report parameters. Leave blank for a complete report broken down by each piece of equipment with a summary of downtime on the last page.
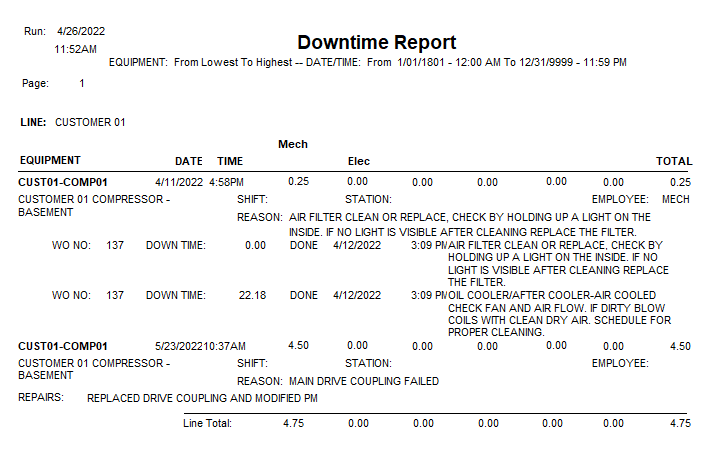
The COGZ Maintenance Management Software Downtime Report will give you a total breakdown time for the equipment listed by the category options that have been specified in the System Defaults Form.
Additional information on COGZ Downtime Tracking can be found in the COGZ Manual under Downtime List.
|

